
Introduction to the MRTK (Part-1)
Updated: Jan 27, 2021
In this tutorial we will be discussing about the Microsoft's Mixed Reality Toolkit-Unity. The followings are the prerequisites to complete this task.
A Windows 10 PC configured with the correct tools installed
Windows 10 SDK 10.0.18362.0 or later
A HoloLens 2 device configured for development
Unity Hub with Unity 2019 LTS installed and the Universal Windows Platform Build Support module added
First of all let us create a New Project in Unity (Ensure Templates is set to 3D). Then go to File > Build Settings..

Lets import the TextMeshPro Essential Resources to have nice text formatting options. Go to Window > TextMeshPro > Import TMP Essential Resources. Now lets Import the Mixed Reality Toolkit. You can find it here. Now go to Assets > Import Package > Custom Package and import (make sure all assets are selected) the MRTK that you have downloaded.
Selecting MRTK and project settings.
Normally after importing the packages from the previous part, MRTK Project Configurator pop up. If not we must do it manually. To do it manually, go to Mixed Reality Toolkit > Utilities > Configure Unity Project.
Now lets see how to select the Virtual Reality Supported. Go to Edit > Project Settings > Player > XR Settings & select Virtual Reality Supported. In the "Depth Format", lets select the 16-bit depth.
Creating and configuring the scene:
Go to Mixed Reality Toolkit > Add to Scene and Configure. The the following two objects circled by the red color will appear in the Hierarchy windows.

In the MixedRealityToolkit Inspector windows, make sure that the configuration profile is set to DefaultMixedRealityToolkitConfigurationProfile.

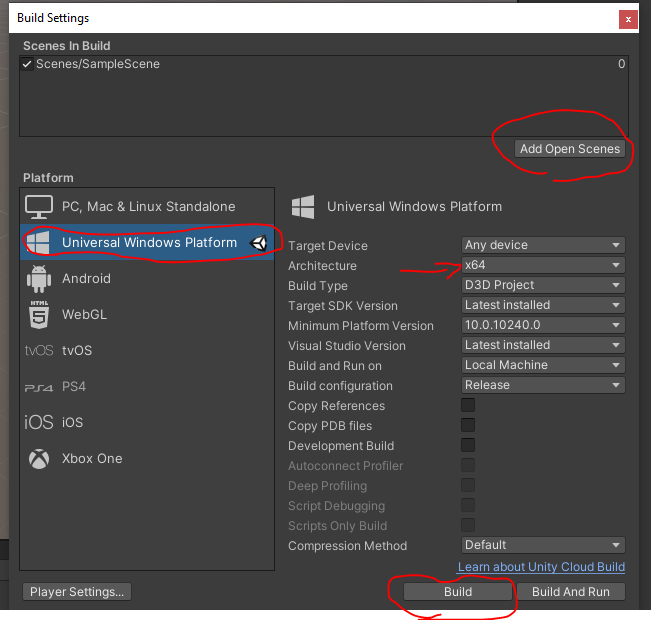
If everything is finalized, lets build it. To build, go to File > Build Settings.
The following is the screen-shot. Make sure the scene is added.
The following is the outcome of the build. Note that I have created a Build folder, then release_x64 & then build it inside it.

When it is complete like above, open the MRTK_GettingStarted in Microsoft Visual Studio. Select release & x64 architecture.

Then we can press start button and wait for sometimes to run. Now if we open the HoloLens 2 Emulator, we will see the following windows, in which we can manipulate the icons in the screen.

Configuring the MRTK profiles:
In the section lets see how to customize and configure MRTK profiles & hide the spatial awareness mesh.
At first we will clone the default configuration profile ---> To do this;
In the Hierarchy window, click MixedRealityToolkit game object, then in the Inspector window, change the MixedRealityToolkit Configuration Profile to the DefaultHoloLens2ConfigurationProfile, and moreover, press the copy & customize. It will open a new windows;

Now you can rename as you want & press clone; Here I renames it as "GettingStartedMixedRealityToolkitConfigurationProfile"

Enable the Spatial Awareness System:
In the MixedRealityToolkit inspector windows, enable the spatial awareness system on startup.

Clone the default Spatial Awareness System Profile:
Then dont forget to clone it;
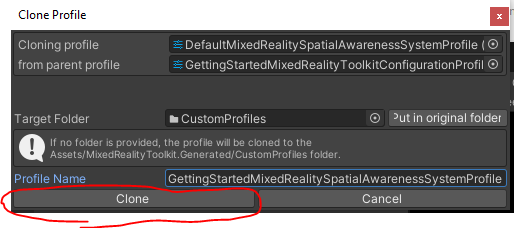
Clone the default Spatial Awareness Mesh Observer Profile
Now expand the Windows Mixed Reality Spatial Mesh Observer section, click clone to clone to it.

Change the visibility of the spatial awareness mesh:
To make the spatial mapping mesh invisible, change the display option to Occlusion.

Positioning objects in the scene:
In this section we will learn how to position objects in the scene and to use MRTK's Grid Object Collection feature.
Import the following unity package in to Unity. MRTK.HoloLens2.Unity.Tutorials.Assets.GettingStarted.2.4.0.unitypackage. You can find it here.
Now create an empty game object in Unity, name it as RoverExplorer. Set the following parameters as it is;
Position: X = 0, Y = -0.6, Z = 2
Rotation: X = 0, Y = 0, Z = 0
Scale: X = 1, Y = 1, Z = 1
Now go to the Assets > MRTK.Tutorials.GettingStarted > Prefabs

- Drag the Table prefab on to the RoverExplorer game object to make it a child of the RoverExplorer game object.
- Drag the RoverAssembly prefab on to the RoverExplorer object to make it a child of the RoverExplorer object.
Inside the Rover Explorer, create RoverParts and set up as follow.

Set the following parameters in the transform windows of the RoverParts;
- Position: X = 0, Y = 0.06, Z = 0
- Rotation: X = 0, Y = 90, Z = 0
- Scale: X = 1, Y = 1, Z = 1
Duplicates the parts & put it into the RoverParts.
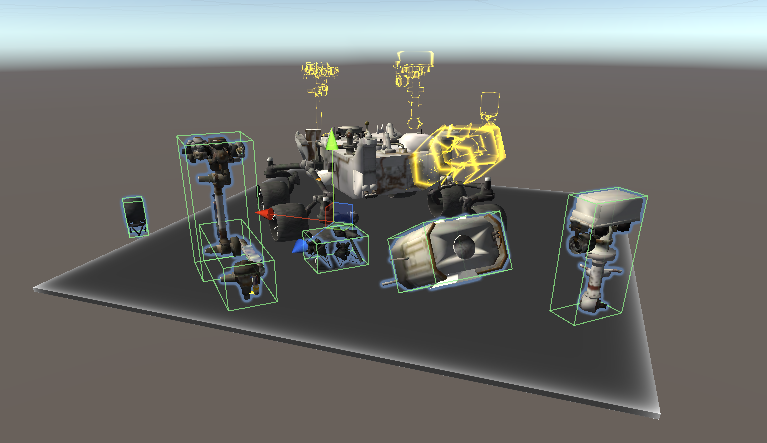
Now select the RoverParts, and then in the inspector window, click the Add Component, and then search for the GridObjectCollection. Add the GridObjectCollection component to the RoverParts game object.
Now configure the GridObjectCollection as follows:
Sort Type: Alphabetic
Layout: Horizontal
Cell Width: 0.25
Distance from parent: 0.38
Once everything is set, press Update Collection.
Creating dynamic content using Solvers:
Here we will discuss the MRTK's solvers, and how to use the solvers to direct the user to objects, and how to use solvers to reposition objects.
The MRTK's solvers are located in the MRTK SDK folder. Go to Project window, navigate to Assets > MRTK > SDK > Features > Utilities > Solvers.
Using the Directional Indicator Solver to direct the user to objects:
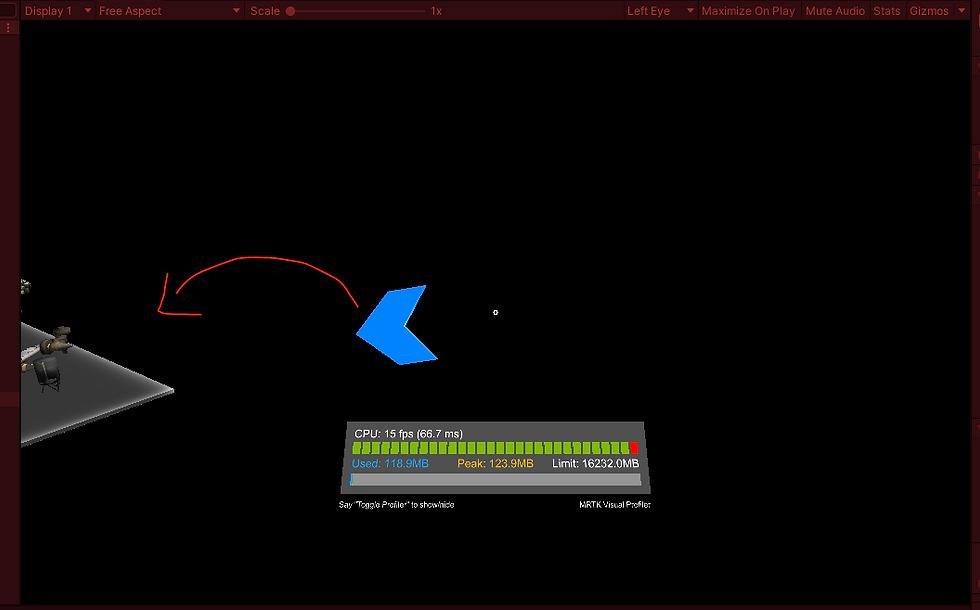
From the Project window go to the Assets > MRTK. Tutorials. GettingStarted > Prefabs folder, click-and-drag the Chevron prefab into the Hierarchy window, and set it's Transform Position to X = 0, Y = 0, Z = 2 to position it near the RoverExplorer object.
In the inspector window, use the Add Component button to add the DirectionalIndicator.
Lets configure the DirectionalIndicator and SolverHandler components now. Assign the RoverExplorer to the DirectionalIndicator component's Directional Target by dragging it from the Hierarchy window into the None (Transform) field. Make sure the following things are configured.

If we press the play button, we can see the arrow indicating the field of view.
Using the Tap to Place Solver to reposition objects:
Now go to RoverExplorer > RoverAssembly, and then in the Inspector window, use the Add Component button to add the Tap To Place .

Make sure the followings are set as mentioned.
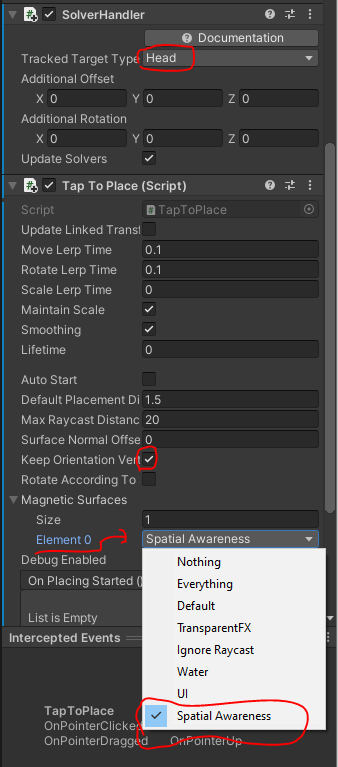

No Function dropdown, select TapToPlace > float SurfaceNormalOffset.
Make sure the argument is set to 0.
Creating a static panel of buttons:
Right-click on the RoverExplorer game object and Create Empty object as a child of the RoverExplorer, lets name it as object Buttons. Now go to Assets > MRTK.Tutorials.GettingStarted > Prefabs folder, click-and-drag the PressableRoundButton prefab on to the Buttons object. Duplicate this to get 3 PressableRoundButton objects.
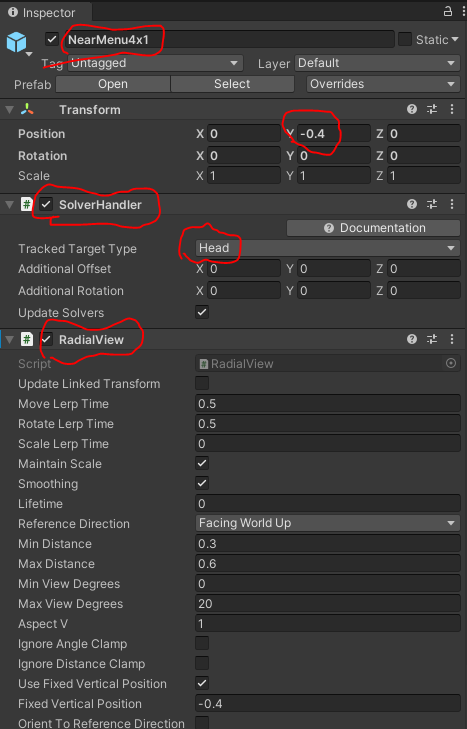
Make sure the button has the following transformation and in the GridObjectCollection the followings are set, like we marked by the red color. Once everything is set, make sure to Update Collection.

Under the button create Hints, Explode, and Reset objects.

For each button, select the SeeItSayItLabel > TextMeshPro child object, then in the Inspector window, change the respective TextMeshPro - Text component text to match the button names.. for e.g
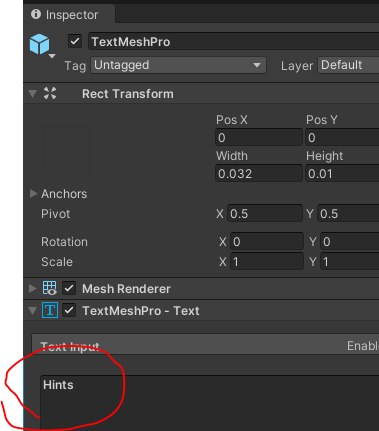
Now make sure the following things are set; Do the same procedure for the rest of the buttons.
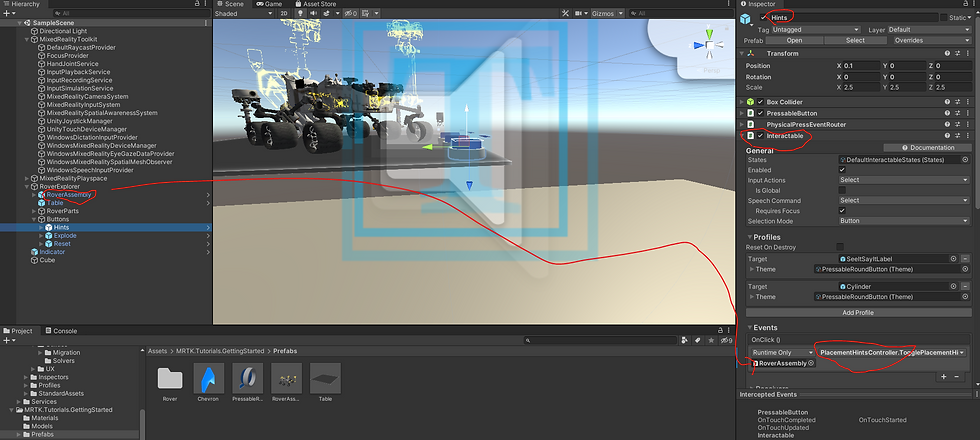
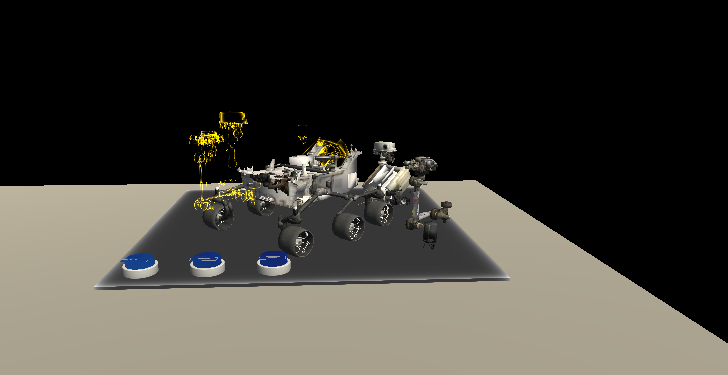
Press the Play button to enter Game mode, then press-and-hold the space bar/shift key to activate the hand. Now you can use the mouse to press the Hints button or any other.
References:
https://docs.microsoft.com/en-us/windows/mixed-reality/develop/unity/tutorials/mr-learning-base-05

Comments